How to build the ELG-Balance
By Jean-Louis Naudin
created on May 21th, 2000 - JLN Labs - Last update May 23th, 2000
How to build the ELG-Balance
By Jean-Louis Naudin
created on May 21th, 2000 - JLN
Labs - Last update May 23th, 2000
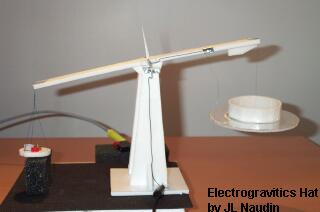
The ELG-Balance is a very helpful device for detecting some weight change or vertical thrust during your electrogravitic experiments. This is very simple to build and you need only common material like :
- a simple polystyrene foam sheet ( 6mm thick ),
- a cutter blade (spare part),
- cyanoacrylate glue,
- some aluminum sheet
- a tooth pick,
- a cutter,
- thin insulated wire...
The ELG-Balance construction procedure :
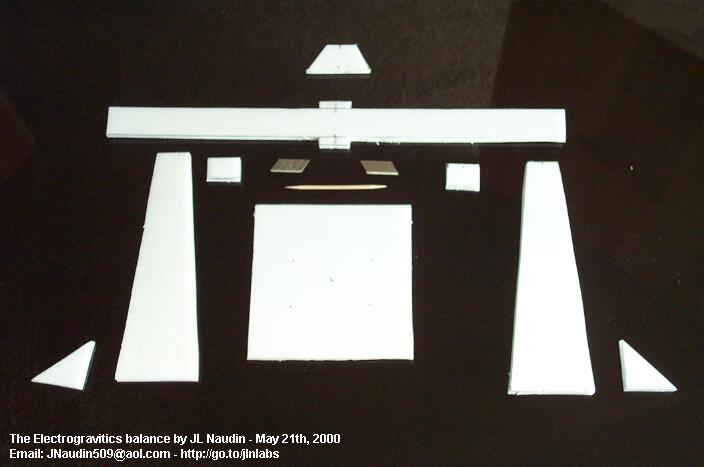
Step 1 :
Cut all the ELG-Balance parts from a 6mm foam sheet with a simple cutter following the diagram below :
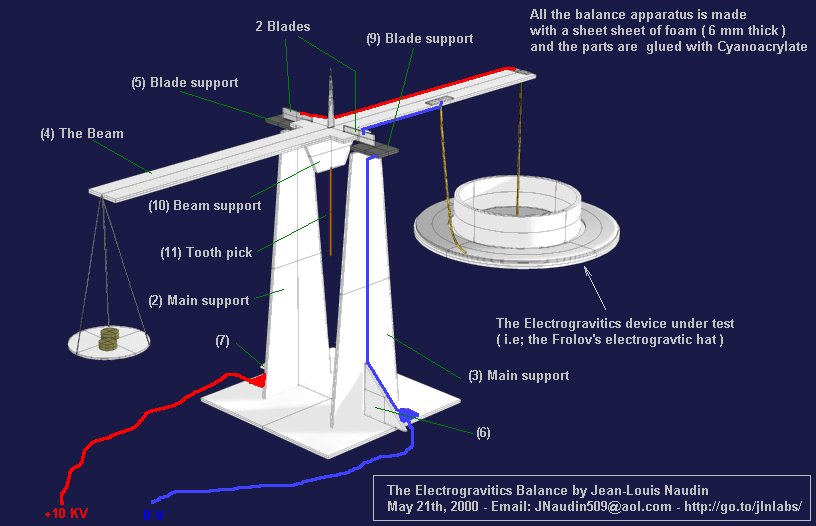
Step 2 :
Glue with cyanoacrylate all the parts following the assembly view below :
Be careful : Use very few of cyanoacrylate (CA) glue, because the CA dissolves the polystyrene.
Step 3 :
To build the blades which sustain the beam of the balance, use two pieces (15mm length) of cutter blade and glue them upright with CA on each side of the main beam (4). See the diagram above and the detailled picture below :
Step 4 :
Glue a rectangular sheet of aluminum (20x15mm) on the blade supports ( 5) and (9), don't forget to glue a tooth pick (11) under the beam support (10).
Now, check the balance equilibrium.
Step 5 :
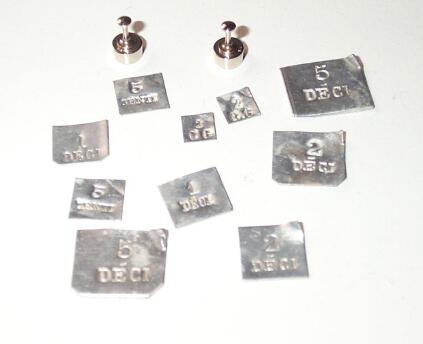
Connect insulated wires has shown in the main diagram above (the blue and red wires), attach on one side of the beam a small foam disk for supporting the counterweights and, on the other side of the beam, hang the ELG-Hat v1.0 with its own wires. Place the ELG-Balance with its ELG-Hat in an equilibrium state. The ELG-Balance is very sensitive, it is able to detect a weight loss of 0.01 gramme ( Max. load = 10 grammes ). You may use calibrated weights commonly used with high precision balances.

Your ELG-Balance is now ready for your electrogravitic tests...
Return to the ELG-Hat experiment
See also :
Documents references :
![]() Email : JNaudin509@aol.com
Email : JNaudin509@aol.com
Return to the Advanced Propulsions Researches page


