Method for
"conditionning" a carbon resistor
by Jean-Louis Naudin
Created on 11-24-00 - JLN Labs - Last update 12-08-00
You will find below a method for building yourself a non-linear resistor with a common old carbon composite resistor. This component has some interesting characteristics such as a high resistance in DC and a low resistance at AC High Voltage ( >1KV )....
Material required :
Procedure :
In the pictures below, I have used a 220K 1/2 carbon resistor for a demonstration purpose, but I recommend you to use a 100 Kohms 5 Watts carbon resistor for your testing.
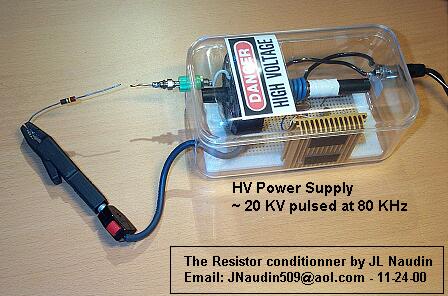
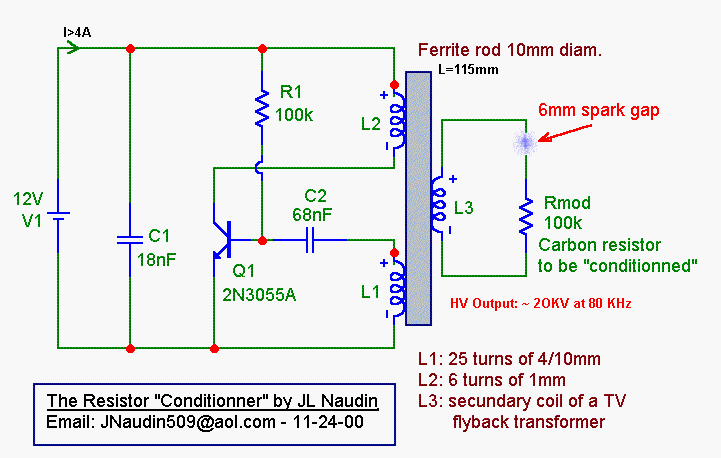
The HV power supply arrangement used as the resistor
conditionner
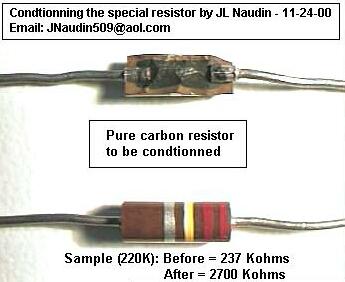
Above, you see that the resistor is made with carbon (
no wire )
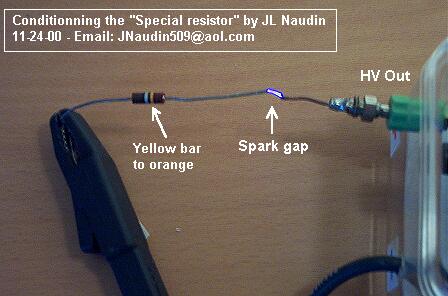
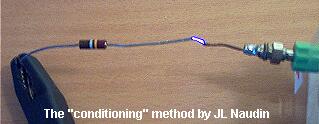
The "conditionning process", you may notice
the spark
and the change of the color bar of the
resistor.
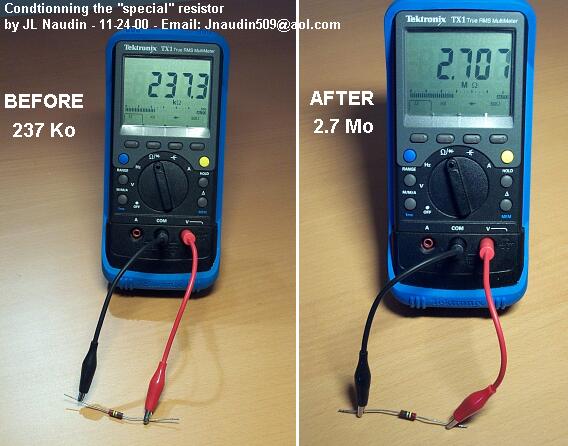
The pictures above see the change of the resistor
value after the process
For more informations, you may write me directly at : Jnaudin509@aol.com
All informations in this page are published free and are intended for private/educational purposes and not for commercial applications Disclaimer: The author assumes no liability for any incidental, consequential or other liability from the use of this information. All risks and damages, incidental or otherwise, arising from the use or misuse of the information contained herein are entirely the responsibility of the user. Although careful precaution has been taken in the preparation of this material, I assume no responsibility for omissions or errors in the diagrams or measurement datas published here. |
Return to the MEG project home page